环境:
操作系统:Windows 2003 Server SP2
PHP 版本:php-5.2.6-Win32
1.下载 fastcgi For IIS6
http://www.microsoft.com/downloads/details.aspx?FamilyID=2d481579-9a7c-4632-b6e6-dee9097f9dc5&displaylang=en
下载之后,双击运行安装。
安装后在 C:WINDOWSsystem32inetsrv 目录下产生了五个文件。如下图:

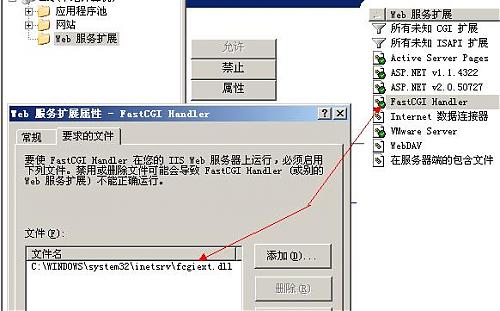
同时在 IIS 的 “Web 服务扩展”里多了 FastCGI Handler。
2.下载 PHP5.25 Windows 版
http://www.php.net/downloads.php
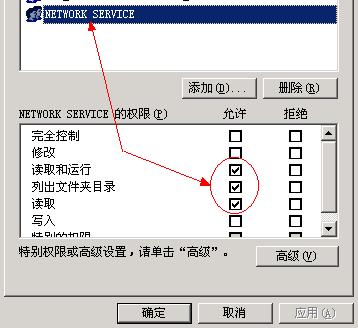
下载 .zip 格式的版本,下载后解压至 D:PHP 目录,并给 IIS 启动帐户组或用户赋予读取和运行权限。如下图:
也可以解压到别的目录。
3. 注册 PHP 到 FastCGI
打开 C:WINDOWSsystem32inetsrvfcgiext.ini 文件。
; This is the configuration file for the FastCGI handler for IIS 6.0.
; The FastCGI handler will look for this file in the same directory as
; fcgiext.dll. By default, the FastCGI installer will place this file into
; the %windir%system32inetsrv directory.
理解:只要“Web 服务扩展”里的 FastCGI Handler 为允许时,在加载 fcgiext.dll 时,会读取 fcgiext.ini 配置文件的内容,根据里面的配置为每个网站提供映射。
在 [Types] 下添加以下配置:
[Types]
php=PHP
[PHP]
ExePath=D:PHPphp-cgi.exe
“php”表示扩展名,“PHP”是配置节名称,以“[PHP]”定义。
4. 配置 php.ini
将 D:PHPphp.ini-recommended 复制一个,然后重命名为 D:PHPphp.ini
打开 D:PHPphp.ini,修改:
其它的根据实际需要对 php.ini 进行设置修改,这里只针对能跑 php,修改完记得重启 IIS。
5. 配置网站
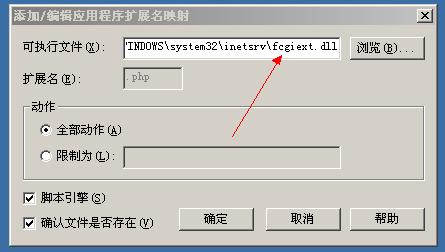
右键网站 => 属性 => 主目录 => 配置 => 添加,如下图配置:

可执行文件路径:C:WINDOWSsystem32inetsrvfcgiext.dll
6. 创建测试页
<?php
phpinfo();
?>
看到类似下图所示效果就说明服务器可以跑 php 了。
打开后如果出现提示:
No input file specified.
可能是没配置 fastcgi.impersonate。
如果还觉得麻烦,那就到 http://www.zend.com 下载 Zend Core,这个就什么都不用配置,安装完就可以使用了,连 mysql 都有。